
Have you ever wanted to pick up photography as a hobby or learn how to use a camera other than your smartphone? Look no further than this article for advice because we will breaking down tips to help you learn the basics of photography.
The Rule of Thirds
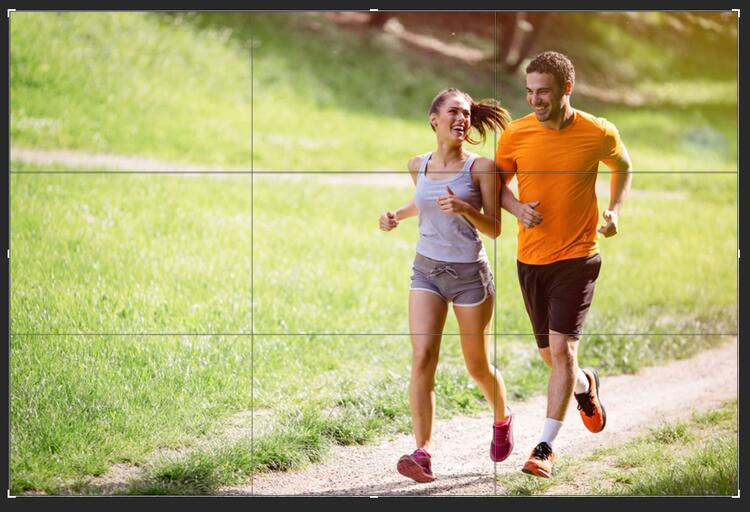
To learn the basics of photography the first thing you should understand is the rule of thirds.
Simply put, the rule of thirds states that a photo is most visually appealing when its points of interests are framed along four lines that divide the photo into thirds horizontally and vertically.
These lines break the photo up into nine squares or sections, and the human eye tends to gravitate to content placed where these lines intersect.
See the photo above for an example of this. Notice how the subjects of the photo have been framed along points where the lines intersect on the right side/third of the photo.
If the subjects would have been framed dead center, it would make the photo seem unbalanced and bother that part of your human brain that constantly looks for patterns and uniformity.
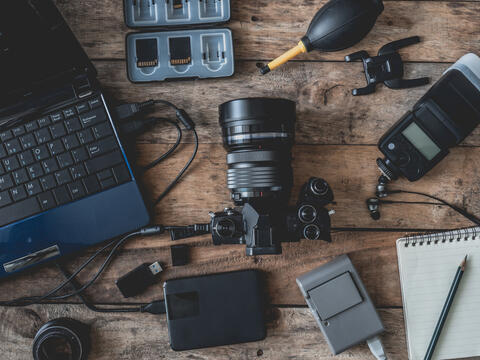
Camera Mechanics and Settings
Next up if you want to learn the basics of photography you need to understand the three main mechanics/settings behind taking a photo.
These settings are shutter speed, ISO, and aperture.
When you leave your camera on the automatic setting it will adjust these for you, but full auto doesn’t always do a great job of finding the proper settings, and it can leave you with some mediocre images.
Let’s take a look at each of these settings to help you better understand what exactly they are responsible for.
Shutter Speed
The shutter speed setting on your camera controls how long your camera’s film or digital sensor is exposed to light when you press the button to take a picture.
Having your shutter speed set to 500 means that the shutter will stay open for 1/500 of a second. Lower the shutter speed to 250, and the shutter will stay open for twice as long and let in twice as much light.
So, if you are taking photos but they’re turning out dark aka under exposed, you can lower your shutter speed to let in more light.
However, just know that your shutter speed controls whether a moving subject appears to be frozen in place or blurry in a photo.
If you take a picture of someone riding a bike and your shutter speed is only set to 100, that person on the bike will appear to be a blurry mess.
Aperture

The next setting to understand if you want to learn the basics of photography is aperture.
Aperture controls the size of the opening in your camera’s lens, and like shutter speed it affects how much light is exposed to your camera.
It also controls how much is in focus when you take a picture, so this is an extremely important setting to understand.
When you adjust the aperture on your camera you’ll see that the setting is displayed like f/1.8, f/4, f/8 and so on.
Aperture f/1.8 means the opening in your lens is very large, it lets in lots of light, and only what your aiming/focusing on will appear to be in focus.
An aperture at something like f/1.8 is how people take those portrait photos where the person is sharply in focus but the background is completely blurred out (as shown above).
If you go in the opposite direction and take a photo at something like f/22, it will put almost everything in focus whether it’s in the foreground or the background. But just remember that the higher your aperture is, the less light you’re letting in.
ISO
The last setting to know if you want to learn the basics of photography is ISO.
Digital cameras convert light exposed to its sensor into electrical signals for processing. To increase its sensitivity to light, a camera can boost these electrical signals.
ISO refers to this process. If you raise the ISO setting on your camera, you’re basically increasing the camera’s sensitivity to light.
To understand why this setting is so useful, let’s say you’re photographing football at night.
You need a high shutter speed to capture people in motion, your aperture is as open as it will go to let in the most light, and the only source of light in the environment are the football field lights.
Your other settings are stuck and you’re not going to magically get more light in your environment. So what do you do? You raise the ISO and increase your camera’s sensitivity to light.
If your photos are dark at ISO 100, you can raise it to 200 and your photos will be twice as bright. Double it again to 400 and the brightness of your photos will double again as well.
This brightness doubling can continue up to 800, 1600, 3200 and so on. But be warned: the higher your ISO is the worse your picture quality will be.
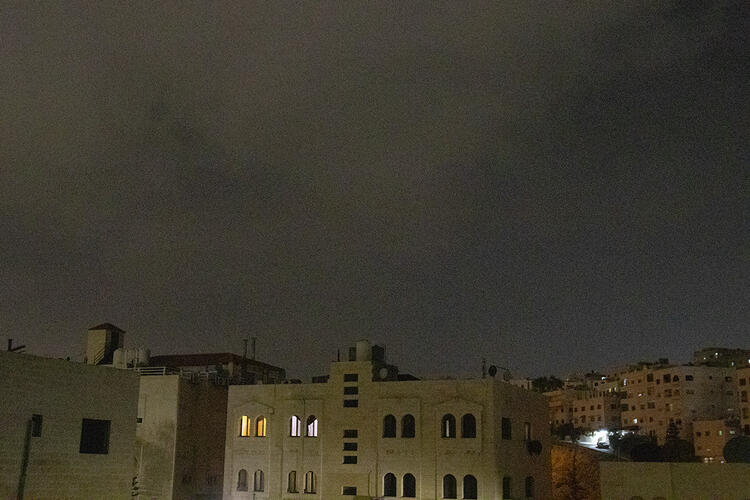
For most cameras this difference isn’t very noticeable below ISO 800, but as soon you hit ISO 1600 and above you’ll notice a grainy look to your shots known in the photography world as noise.
For example, the photo above was taken at ISO 6400 and it leaves the night sky with a very grainy/noisy look to it. Only increase the ISO setting when you can’t let in more light by adjusting your shutter speed or aperture.
But those are some of the most important basics to learn in photography. Once you understand the rule of thirds, shutter speed, aperture, and ISO, you’re ready to get out there and hone your skills as a photographer.
's Sepah News website on July 14, 2026, allegedly shows missiles being launched from an undisclosed location towards US targets in Bahrain and Kuwait. AFP")
 as he stages a sit-in protest calling for Prime Minister Narendra Modi's resignation outside the latter's residence in New Delhi on July 21, 2026, a day after police crackdown against the protesting Cockroach Janta Party (CJP) supporters demanding the Education Minister Dharmendra Pradhan step down over alleged NEET examination irregularities. AFP")


